1 My little brain
In this National Day holiday, I made a 3D model of my brain and found a company on Taobao to 3D-print it. The finished product is about 10cm × 9cm × 6.5cm in volume (60% of the real size) and about 200g in weight. It looks so nice that every sulcus and gyrus is full of details. It is a really fantastic feeling to hold my brain in my hands.

Here, I will share what I did so that you can also print your own brain. The whole process is not very complicate, so take it easy.
2 Print your brain step-by-step
2.1 Scan your brain
First of all, you need to scan your brain with MRI, getting a T1 anatomical image. In my opinion, participating in a MRI study is the best way to get this image:).
2.2 Reconstruct brain surfaces
Based on the anatomical image, a preliminary brain model can be created by FreeSurfer. The command recon-all performs cortical reconstruction
process, generating serveral brain surfaces. Below is a template of this command.
recon-all         \
  -sd subject_dir \ # root directory of the image
  -s subject_name \ # output directory
  -i input_image  \ # filename
  -all            \ # run all processing steps
  -parallel       \ # use more threads to improve speed
  -threads num_of_threads
2.3 Convert and edit the surfaces
After the cortical reconstruction process is finished (3-10 hours later), the surfaces (meshes) are stored in the “surf” folder under the “subject_name” folder. What we need are left and right hemispheres of the pial surface, named “lh.pial” and “rh.pial” respectively. To make these surfaces readable by other softwares, we have to run the command mris_convert, which converts the surfaces into stl format.
# left hemisphere
mris_convert lh.pial lh.pial.stl
# right hemisphere
mris_convert rh.pial rh.pial.stl
To combine and edit these two hemisphere meshes, you need to install MeshLab. Please note that MeshLab can not undo the changes you have made. If you make some mistakes, you can only reload the original mesh.
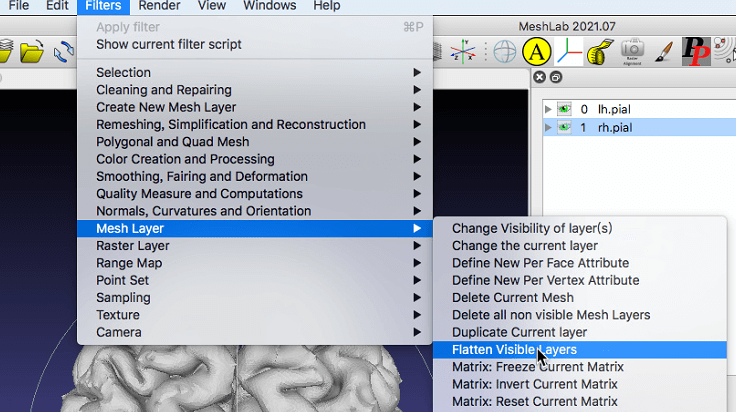
First of all, open the two files obtained from FreeSurfer in MeshLab, click on “Filters” -> “Mesh Layer” -> “Flatten Visible Layers” and apply, then you will see the meshes are merged.

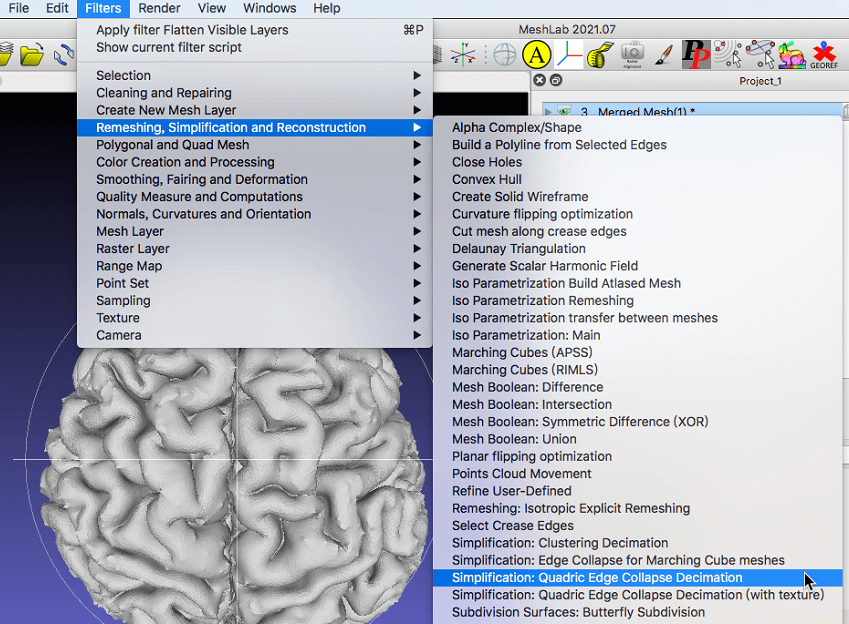
The pial surface generated by FreeSurfer is too complex. Click on “Filters” -> “Remeshing, Simplification, Reconstruction” -> “Quadratic Edge Collapse Decimation” and enter an appropriate target number of faces (I used 70000). This process reduces the number of faces, which also smooth the surface.

To make the surface smoother, you can click “Filters” -> “Smoothing, Fairing and Deformation” -> “Laplacian Smooth” and click apply.

Then you can export the mesh by clicking on “File” -> “Export Mesh As…” and selecting stl format.
2.4 Refine the brain model and print it
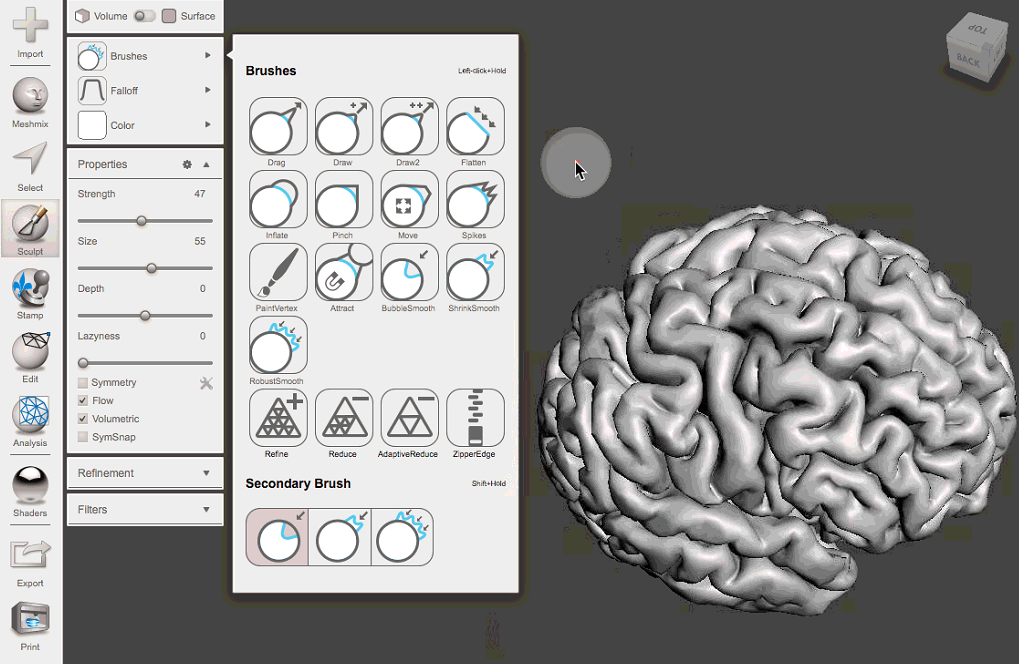
Meshmixer is a free software providing lots of tools that can refine the brain model. Several brushes (e.g. BubbleSmooth, ShrinkSmooth and RobustSmooth) are useful to smooth the mesh and remove spikes.

As long as the brain model is ready, you can send it to a 3D printing service to print it out!
